Ultimate Guide: Mastering the Art of Extracting Tracks From a Music CD on Your PC

Ultimate Guide: Mastering the Art of Extracting Tracks From a Music CD on Your PC
Quick Links
- You Need a Disc Drive
- Rip a CD With Media Player
- Rip a CD on Older Windows PCs
- Backing up Your Music
Key Takeaways
- You can use the modern Media Player to rip audio CDs on Windows 10 and 11.
- External disc drives are needed for most modern PCs.
- Ripped music doesn’t have DRM and can be freely moved or copied to other devices.
It’s easy to rip a music CD on Windows for playback and archiving, and you can even do it with the built-in Media Player application. Here’s how to do it.
Microsoft released a new Media Player application for Windows 10 and Windows 11 in 2021, which is designed for playing both video files and audio libraries. That includes the ability to rip music CDs, though that feature didn’t arrive until 2022 . The classic Windows Media Player is still around on older computers, or as an optional download on newer PCs.
Got a Mac? Check out our guide for ripping an audio CD on Mac .
You Need a Disc Drive
You need a disc drive connected to your PC to read and rip CDs, so if you don’t already have one, you’ll need to get that first. The ASUS ZenDrive Silver is a basic option with support for reading and writing CDs and DVDs. It should come with a USB Type-C cable in the box, but if not, you might need a USB Type-A-to-C adapter or USB hub to connect it to laptops without a Type-A port.
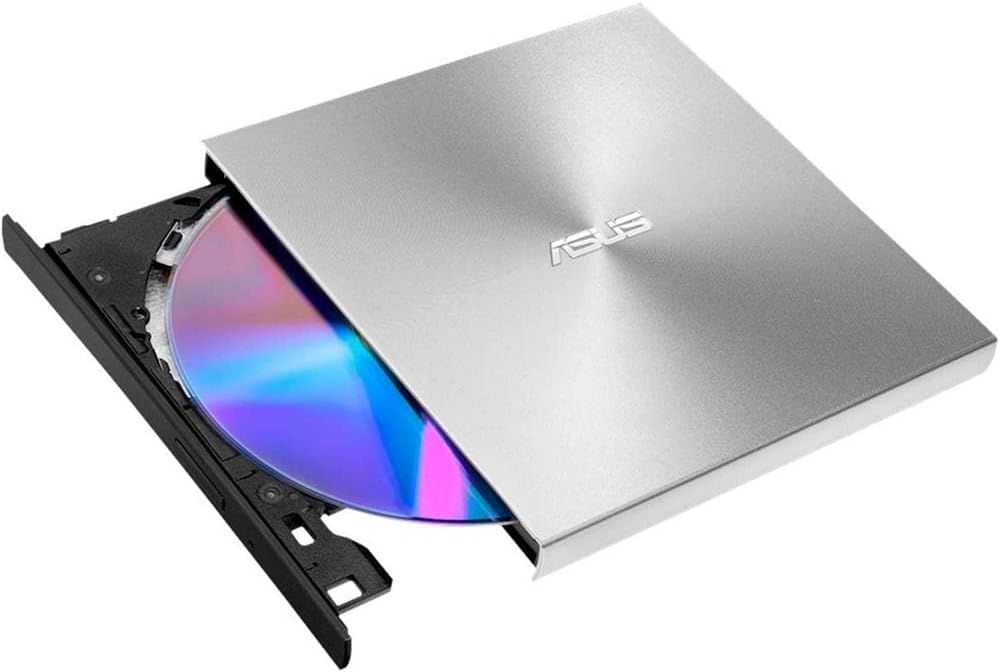
ASUS ZenDrive Silver
The ASUS ZenDrive Silver is a basic and affordable external optical drive, with support for reading and writing DVDs and CDs. It’s designed for both Windows and Mac.
$35 at Amazon See at Walmart See at Best Buy
If you have a desktop PC with an empty drive bay, an internal drive like the LG WH16NS40 is also an option. However, an external drive doesn’t require opening up your PC, and can be easily shared across different computers.
The disc drive can be useful for more than just ripping CDs, too. You can play DVDs and some Blu-ray movies with applications like VLC Media Player , or read data discs.
Rip a CD With Media Player
You can use the modern Media Player application to manage your local music library and rip audio CDs. It’s installed by default on most Windows 11 computers, just search for “Media Player” in the Start Menu.
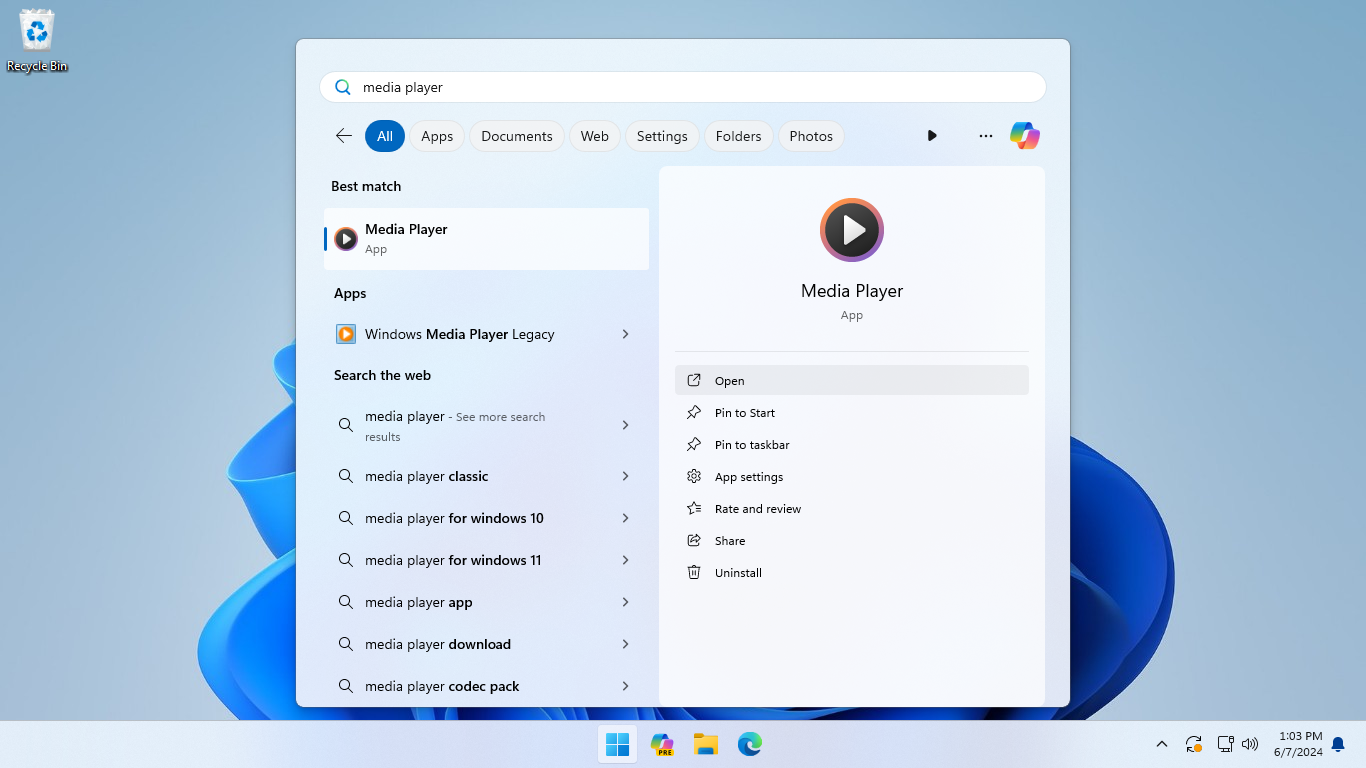
If you don’t have Media Player on your PC, you can download it for free from the Microsoft Store . It requires Windows 10 version 19042 or higher—if your PC is too old, jump to the next section.
After you open Media Player, put your audio CD into your disc drive. It should show up in the sidebar of the Media Player app. You might need to click the menu button on the top-left corner of the window to see the full sidebar. Click the disc to switch to it in the Media Player app.
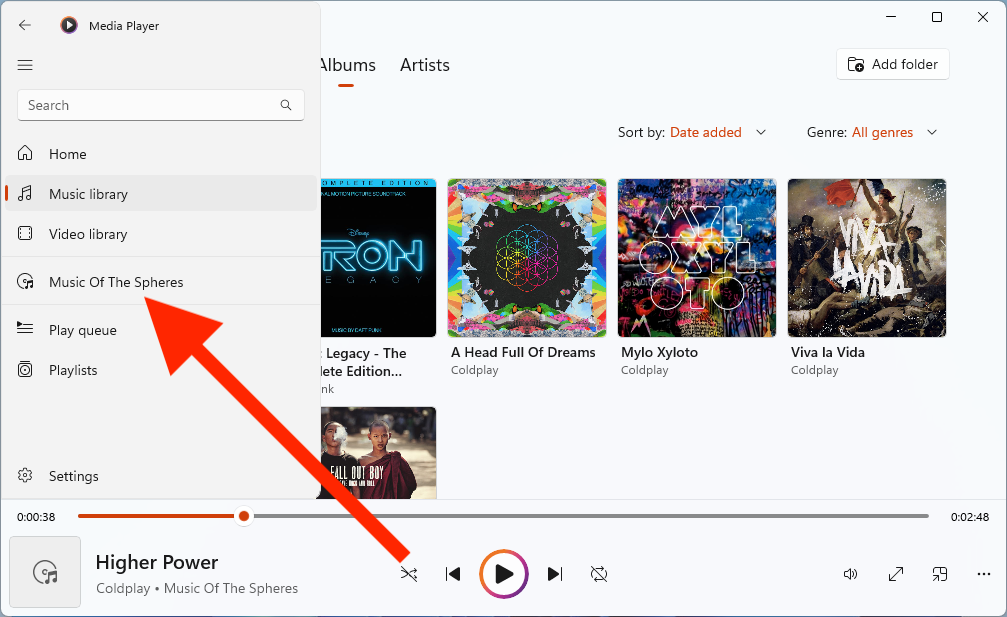
You can play music straight from the disc by clicking the ‘Play all’ button, or by double-clicking on an individual track. If you want to change the default audio import settings before ripping the disc, click the three-dots button and select the “Rip settings” option.
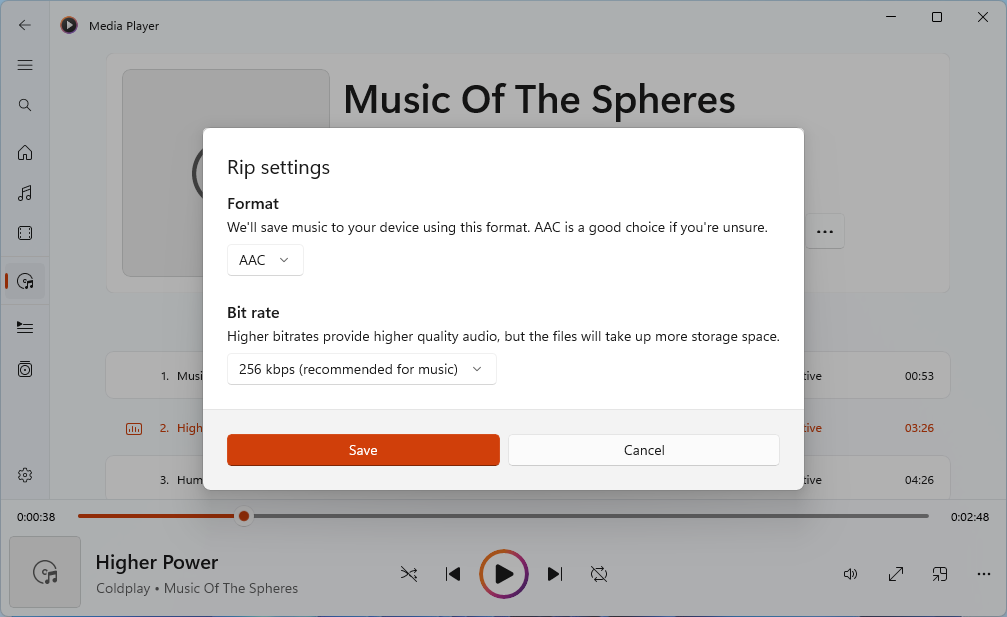
The settings panel gives you options for changing the music format and bitrate. Most people should stick to the default AAC format and 256 kbps bitrate, but the other options can be helpful in specific use cases. For example, if you plan to copy music to a music player or other device that only supports MP3 files, you might want to import music in that format instead of AAC to avoid converting it again later. A lossless format like FLAC or ALAC would give you the highest quality possible, but the difference isn’t all that noticeable with typical speakers or headphones.
When you’re ready, click the “Rip CD” button to start copying the audio to your PC. You’ll see progress indicators on each track until the rip is complete.

You can access the your newly-ripped music from the Music tab in the Media Player app. It’s easier to find if you switch to the Albums tab and sort by Date added.
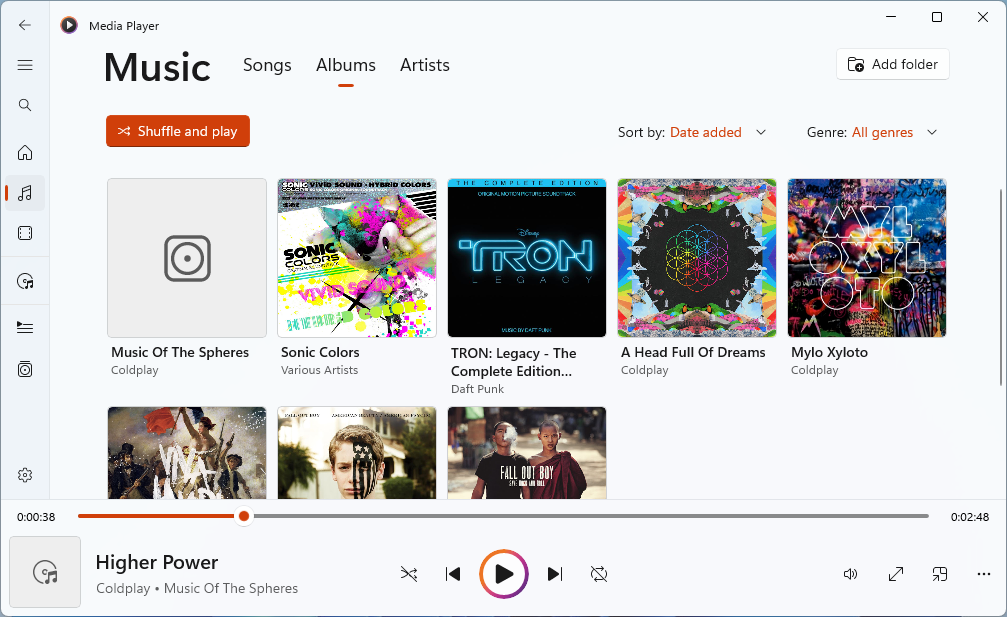
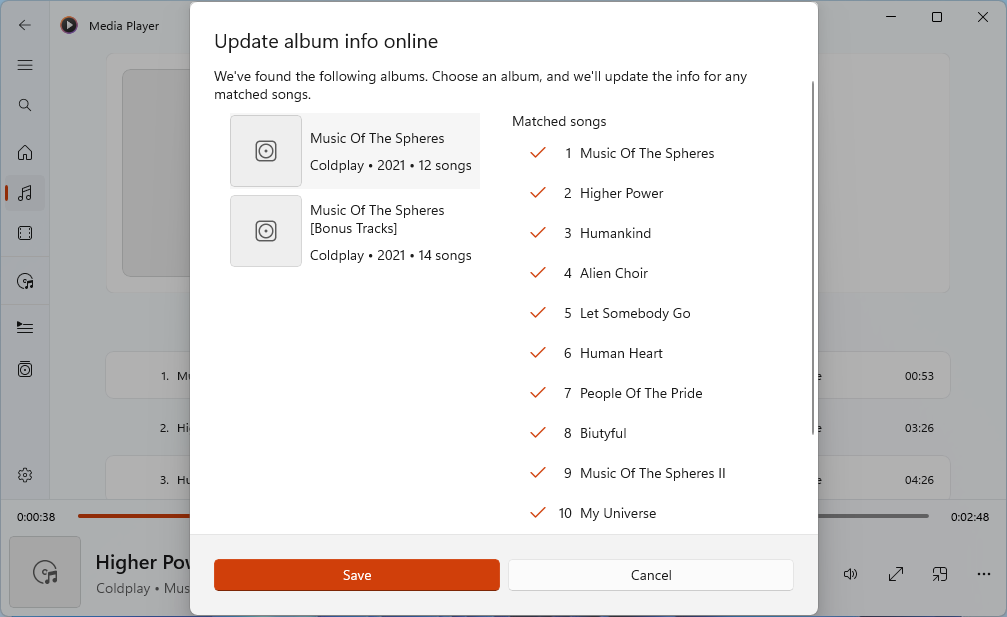
Ripped audio doesn’t include album art or other metadata, but you can fix that with a few clicks. Open the album you just ripped, click the “Edit info” button, then click “Update album info online.”

Media Player will check for metadata online, and if it finds more data, it will ask you for confirmation before writing changes to the files.
Media Player can’t always find album artwork automatically, but you can use a website like Music Hoarders Covers to find the right image, and then import that into Media Player. After you find the image, just click the “Edit info” button on the album again, then click the pencil button to select the right file.
Rip a CD on Older Windows PCs
If you have an older PC that can’t run the modern Media Player application, like a computer on Windows 7 or Windows 8.1, you can use the classic Windows Media Player instead. You can find it by searching for “Windows Media Player” in the Start Menu. You might also be able to open Media Player by opening the Run dialog (the Win+R keyboard shortcut), typing the below command, then clicking the OK button.
wmplayer
After opening Windows Media Player, insert the audio CD into your drive. You should see the CD in the left sidebar. If not, try closing and re-opening Windows Media Player.
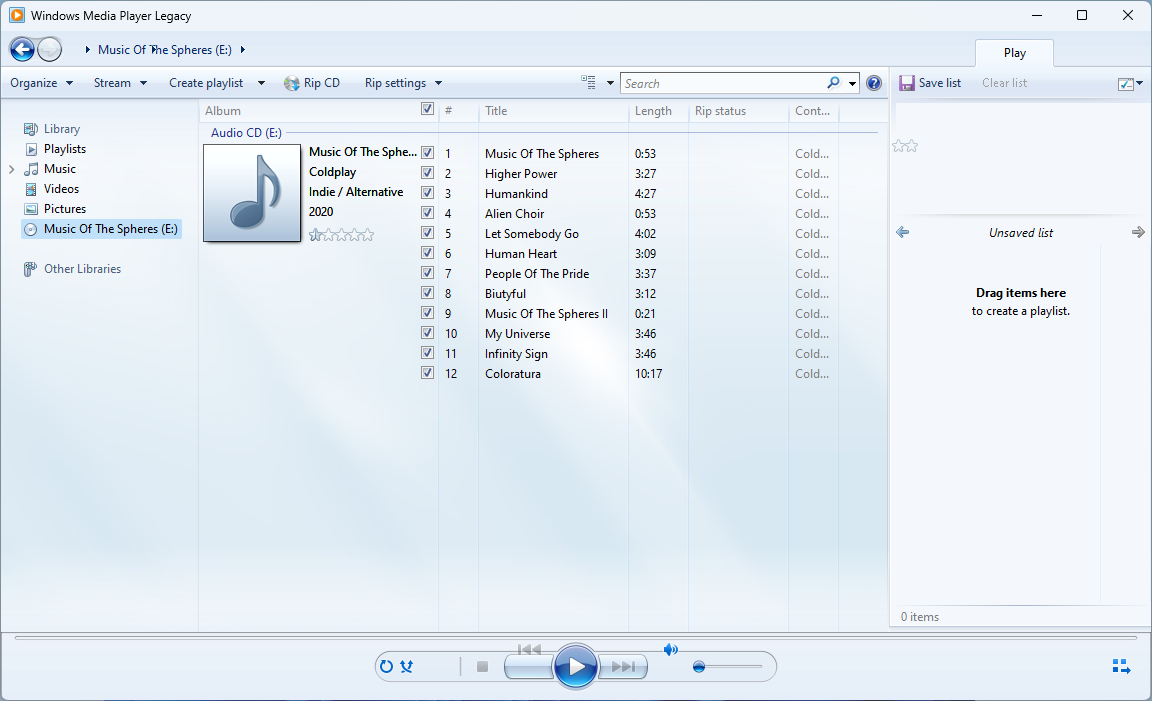
Click the CD in the sidebar to see its contents. You can play music straight from the disc by clicking the large play button at the bottom of the window, or by double-clicking on an individual track. If you want to change the default audio import settings before ripping the disc, click the “Rip settings” dropdown menu.

If you’re not sure what options are best, you should select MP3 under the “Format” menu, and 256 Kbps under the “Audio Quality” menu. That’s a good middle ground between audio quality and drive space—the default settings (at least on my PC) of MP3 and 128 Kbps is much lower quality than the original CD. A lossless format like FLAC or ALAC would give you the highest quality possible, but the difference compared to a high-bitrate MP3 isn’t usually noticeable with typical speakers or headphones.
When you’re ready, click the “Rip CD” button to start ripping the audio to your music library. You’ll see progress bars on each track until the rip is complete.
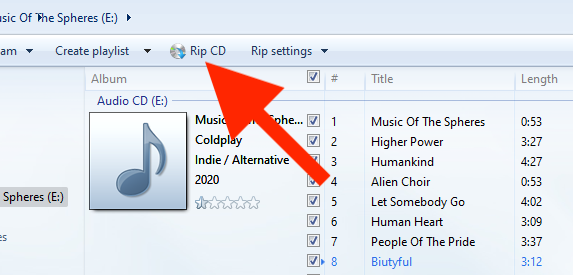
After the rip is complete, your music will be accessible from the “Music” tab in the left sidebar.

Ripped audio doesn’t include album art or other metadata, but you can fix that with a few clicks. Right-click the album you just ripped, then select “Find album info.”
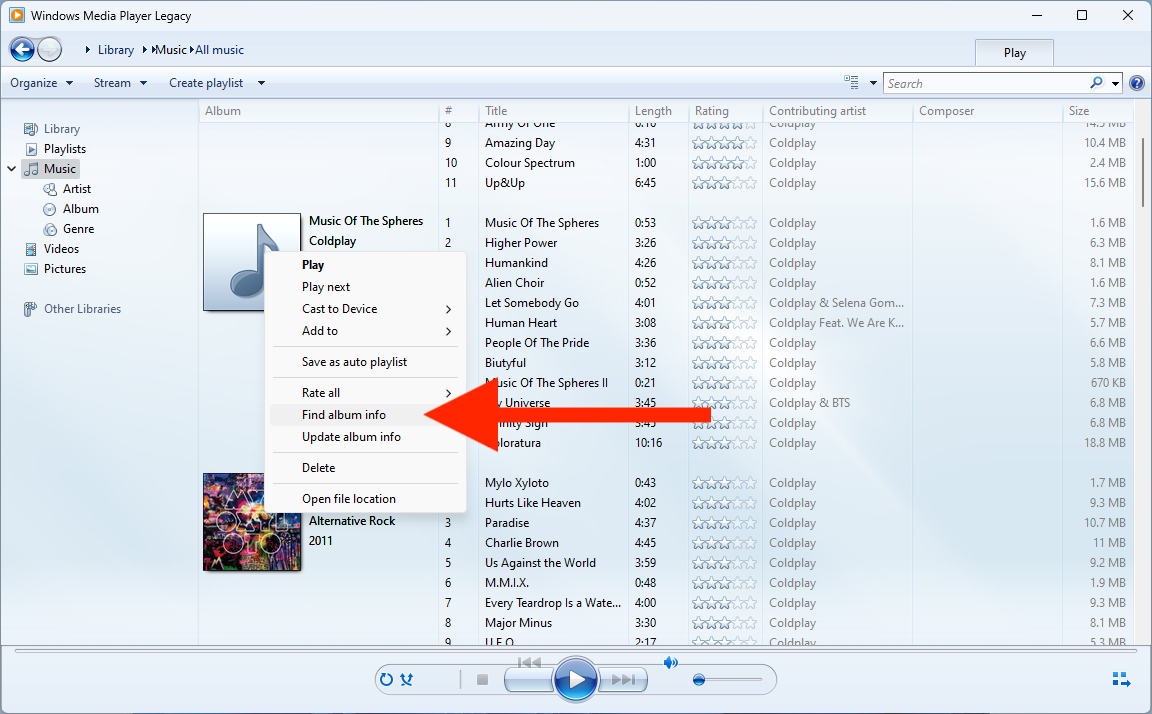
Windows Media Player will check for metadata online, and if it finds more data, it will ask you for confirmation before writing changes to the files.
Backing up Your Music
There’s no digital rights management (DRM) on music you rip from an audio CD, so you can freely copy it to your other devices, back it up to another drive, or upload it to your cloud storage.
The new Media Player and the classic Windows Media Player both store music files in your Music folder by default. You can get there by opening the File Explorer, then clicking the “Music” shortcut in the sidebar.
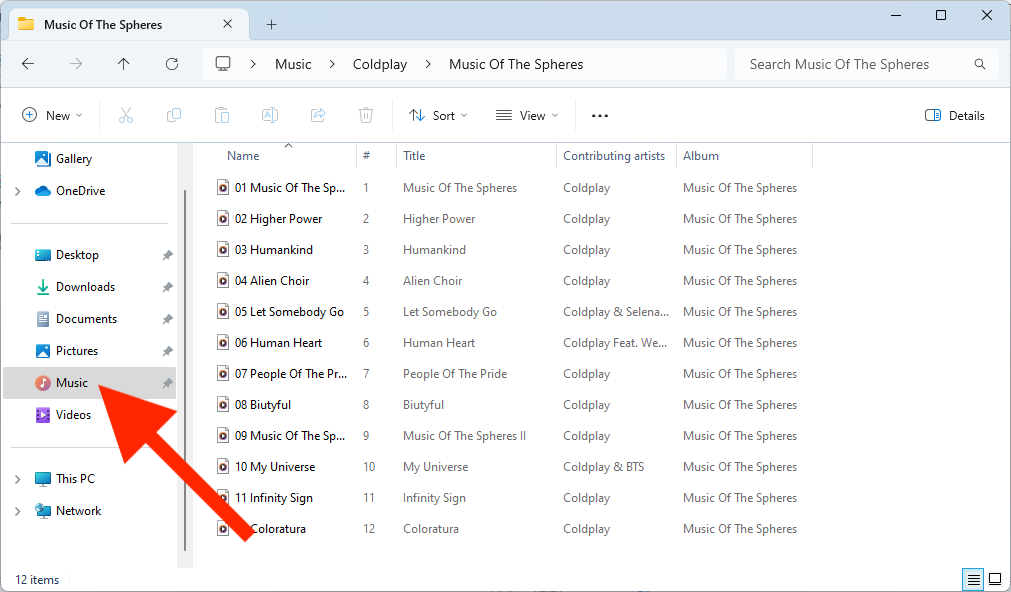
If the shortcut isn’t in your sidebar, open the Windows Run dialog (Win+R keyboard shortcut), type the below command, and press the OK button.
shell:My Music
The new Media Player and the legacy Windows Media Player both allow you to add more folders to act as music libraries, but your Music folder is the default location for new ripped music.
Also read:
- [New] In 2024, Navigating Xbox Broadcasts to Facebook Streams
- [Updated] 2024 Approved Unbind From Discord on All Platforms
- 2024 Approved Chuckle-Champions Twitter’s Comedy Corner
- Discover the Leading Solar Portable Chargers - CNET Reviews
- Discover the Ultimate 2024 Gas Grill Selection: The #1 Choices for Outdoor Chefs
- Discover the Ultimate Selection: Leading Indoor Gardens Curated by ZDNet
- EcoFlow River N3 Review - Top Pick for Beginners in Portable Power Solutions on ZDNet
- Essential Guide to Selecting the Ideal Houseplants for Productivity in Your Home Office Space
- Expert Picks for the Finest Travel-Friendly Tire Inflators This Year – Reviewed by ZDNet
- Expert Picks for Ultimate Grass Cutting Machines 2024 | GadgetZDnet
- Expert Picks: Leading Portable Screening Devices | CNET Insights
- Expert Picks: The Ultimate Solar Charger Rankings – CNet's Comprehensive Guide
- From Novice to Pro Mastering the Craft of YT Shorts for 2024
- How to Enhance Your Hard Drive's Efficiency: Essential Techniques - YL Computing Insights
- In 2024, Perfect Playlist Placement Techniques for YouTube
- Mastering Bi-Directional Backup and Restore Using AOMEI Backupper for macOS
- New 2024 Approved Best Video Language Changers to Make Your Videos Accessible
- Streamlining Your Social Video Logs on Facebook
- Troubleshooting Guide: Why Is 'gpedit.msc' Missing on Your Windows Home Edition?
- Title: Ultimate Guide: Mastering the Art of Extracting Tracks From a Music CD on Your PC
- Author: James
- Created at : 2024-12-31 17:05:33
- Updated at : 2025-01-04 16:36:16
- Link: https://technical-tips.techidaily.com/ultimate-guide-mastering-the-art-of-extracting-tracks-from-a-music-cd-on-your-pc/
- License: This work is licensed under CC BY-NC-SA 4.0.